Pages
Wednesday, October 29, 2008
Random Giveaway: Thanksgiving Vintage Tin

Tuesday, October 28, 2008
Project: Memory Tree Frame
Distress Ink and/or chalk
Step 3: Once you have an idea of where you want the pictures, start gluing them into place. Using the brush, apply a thin layer of glue to the frame in the area where you want picture #1. Place the picture on the frame and rub it with the dry cloth, making sure to work out any air bubbles.
 Next, apply a thin layer of glue where picture #2 will go. Be sure to overlap picture #1 a bit. After placing picture #2, gently wipe any excess glue off with the damp rag. (Don't rub too hard or you could rub your picture off.) Use your dry rag to rub the picture into place and smooth out any air bubbles. Continue applying pictures all the way around the frame.
 Allow the glue to dry for a few minutes before moving on.
Friday, October 17, 2008
Hotmail Headaches
Please be advised that Hotmail seems to be bouncing all of our emails. If you are using our Photo Wizard, you might want to use a non MSN email account. We can access your photo file, but need an accessible address to send to.
If you have any suggestions on how to fix this, we will be very grateful!
Wednesday, October 15, 2008
We have a WINNER!
 Thanks everyone for participating in our Vintage Tin random giveaway. We loved reading your comments and look forward to hearing from you in the future!
Thought it would be fun to pick an extra winner, so not one but two of you get to contact us at www.mythoughts@storiesbyme.com to determine your Halloween Tin preference. (Pick between Halloween Witch and Scared'y Cat.) Be sure to tell us where to ship your prize and we'll get it in the mail pronto!
Drum roll please..........................
and the WINNERS are:
- Niki said...
-
What a fun and unique way to showcase your craft business! I'm new to your blog and plan to be a frequent flyer!
Tuesday, October 14, 2008
Thanks for visiting!
"There is no tomorrow to remember if we don't do something today." ~ Thomas S. Monson
Life is amazingly full of things to remember. Together, let's explore ways to make remembering a reality! We might not do it all, but we can all DO SOMETHING.
Here's a little something to remember... you have until midnight tonight to add your comments to the list. Tomorrow, we'll post not one...but TWO WINNERS!
Monday, October 13, 2008
Memory Trees FINALLY on Website!
 Here's an exciting piece of news. We can finally announce that our new Memory Tree kits are available on the website. Thanks to our extremely hardworking, and might we add, talented programmer, Mark has gotten these pages ready just in time for holiday shopping! You can access these pages by either clicking on the tree pictured on the home page, or by looking for the Memory Tree menu item under Products.
Keep watching for our vintage tins. They're coming...honest, they are!
Tuesday, October 7, 2008
Random Giveaway: Halloween Vintage Tin
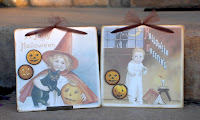
 That's right - we're giving away one of our Halloween Vintage Tins. The tin measures 8x8 inches and includes two hand-finished magnets. The Holiday series feature vintage greeting cards from the Victorian era. We would love to hear your thoughts on our products so tell us what you think!
Yeah, we know...you can't find these tins on our website. We have been sooooo very busy trying to fill orders that we've not had time to put our own house in order (literally, not just figuratively!). We hope to have this fixed soon. There's another reason to check back!
Friday, October 3, 2008
Project: Button Box
 Several people have asked about our Button Box - a place to keep all of your extra family faces when not using them on the Memory Tree. We have put together a step by step tutorial to help you create your own Button Box.
Step 1: Gather Materials


You will need a wooden box, Mod Podge glue, a foam brush, a damp cloth, a dry cloth, a variety of family pictures printed on a laser printer, a razor blade or exacto knife, sandpaper, Krylon Acrylic Matte Finish spray and distressing supplies, if desired.
Step 2: Layout and Attach Pictures
Before you start gluing, it's a good idea to have all of your pictures trimmed. Get an idea of where to place each picture by laying them in position on the box. Once you have a plan, use the foam brush and apply a thin layer of glue on the wood box. Apply just enough glue to cover the space where the first picture will go. Use the dry cloth to rub the picture flat, making sure there aren't any air bubbles. For the next picture, again apply a thin layer of glue where that picture will be placed. Be sure to place glue over the first picture where the second one overlaps. Place the second picture and LIGHTLY wipe around it using your damp cloth to remove any excess glue. Then use the dry cloth to  smooth the picture and remove any air bubbles. Rub gently. If you rub too hard you will rub the picture off. Continue for all sides of the box until the box is covered with your pictures. It's a good idea to have a variety of picture sizes available to fill in spaces as you work through the project. We also like to print our pictures in a combination of black/white (gray scale) and sepia for visual interest.
Step 3: Trim Edges

Step 4: Sand and Distress Button Box
After all of your pictures are glued, trimmed and dry, sand the edges of your box using the piece of sandpaper. We like to soften the corners to help 'age' the box. Rubbing distress ink or chalk on the edges will also give the project an authentic 'old' look. Let the ink dry before giving it 2 or 3 coats of the Matte Finish Spray. This seals your project and protects the pictures.


I love these products. I was thinking of making a box to put all the extra buttons in and wow here it is on the blog. I'm so excited. It will be so much fun for the kids to learn their family lines.