Pages

Saturday, March 27, 2010

A New Family Chart Idea

For more than a year we've been kicking around an idea for a Stories by Me version of a family chart. We're sure you're curious. What makes something a Stories by Me project? Well, since you asked...1. Can you personalize it? In case you haven't noticed, all of our projects are customizable. They're meant to feature family faces and allow for the sharing of stories. (Yes, even the fabric frame project was first introduced with family faces!){We share two different ways to add family faces. In the first example, all we did was trim 3x5 photographs and hold them to the board with the finished magnets. The second example features a lot more faces. For this version we've formatted each face to fit the round buttons ~super easy if you use our Photo Wizard!}

2. Is it versatile? Our very first project was our puzzle blocks. The puzzles were meant as a way for our kids to connect with their great-great grandparents. It wasn't long before we realized that there were as many different puzzle options as there were people making the puzzles. We now try to look at each project and think of the many ways that they can be used. It's our way of igniting your creativity. {We made sure that the designs looks equally well vertically as they do horizontally. Each board comes with predrilled holes so you can hang it if you want. Or, it sits perfectly in an easel. }

3. Is it a good value? We don't need tough times to appreciate good values, though we definitely appreciate them even more in the current economy! We LOVE the size of these new boards and came up with all sorts of ways to use them. Wanting to keep the basic kit price as low as possible, we decided to offer a free download with other chart options. That way you can finish your chart just the way YOU want to! Download our Family Chart Buttons and print the pages you want on scrapbook paper that complements your board design.
{Our kit comes with basic parts for making a Family Home Evening or Family Time Chart: 9x19" magnet board, 10 round buttons, magnet tape, and decorated papers for finishing your buttons. But maybe what you REALLY need is a fun, easy way of charting chores that need to get done at your house. Ok, same board, same supplies; just download our Family Chart Button.pdf to create a chore chart, advent calendar, or monthly calendar.}

4. Do we love it enough to display it in our own homes? Yes, oh yes! Here's the way we're currently featuring the board at our house. My twelve year old can't wait to turn 13. You might think that an advent calendar isn't a big deal by this age, but you'd be DEAD wrong! First thing every morning another buttons comes off as he gets closer to the BIG DAY!Thanks Beth for sharing your gorgeous pictures for this project. Be sure to check out Beth's Photo Studio here.
{Here's our basic Family Chart Kit. Comes with the supplies shown for getting started. You just add the family faces! Our kits will be featured at the Ladies Night next Saturday night at the Fort Union Deseret Book store.... that means they'll be 20% OFF! We'll try to get it on our website shortly after that!}

Connecting with some of our favorite linking parties!The Creative Girl | Skip to My Lou | Twice Remembered | A Soft Place to Land| Keep it Simple | Sumo's Sweet Stuff | A Soft Place to Land | Reinvented | My Frugal Family | Blue Cricket Design | Life in the Pitts | My Backyard Eden | Some What Simple | Life as Lori | Fingerprints on the Fridge | Infarrantly Creative | Creative Jewish Mom

Wednesday, March 24, 2010

Sidetracked with a good book

Life came to a screeching halt this week. My BGF gave me the book The Help by Kathryn Stockett. Typically, I try not to pick up novels unless I'm heading into a long weekend or vacation since I've been known to completely ignore life while I'm caught up in a good book.

I didn't mean to get sucked in. I just planned to read a chapter or two.... kind of a running start on our upcoming spring vacation.

The book held my full attention. It took most of my waking moments and a few of the sleeping ones. The story (while fictional) portrays the dawn of Civil Rights.

I LOVE anything related to history.

I also love writers who can paint pictures with their words. Oh how I wish I had been given that talent.

The good news is that I have returned from the land of blissful reading. We've been working on several new projects and this book derailed any chance of sharing them with you this week. Next week is looking much more promising.

Monday, March 22, 2010

A Silhouette Project of my Own

A couple of weeks ago, I shared this fabulous family tree from Inchmark.

Now I can make my own version! Amy at Positively Splendid provides an easy to follow tutorial for creating the silhouettes. What I love about her explanation, is that it creates a digital version that I can resize and use, for say, making my own family tree...or a wall hanging, ornament, greeting card, gift tag, piece of jewelry...you get the picture!


Crafty Nest made some darling wall art using the silhouette and scrapbook paper.
Birmingham Bargain Mom did something similar with her childrens' pictures.


And check out this display featured at Style at Home.com

So many ideas. Seems like the only thing that I'm short on is the time!

Tuesday, March 16, 2010

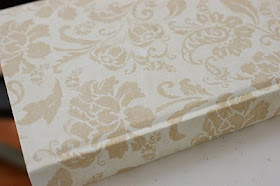
Transformed Books

Uh~Oh. I think I've just found another gotta do project. This one uses old books {I have LOTS of old books}, mod podge {I have bottles and bottles of Mod Podge} and scrapbook paper {I have enough scrapbook paper to open my own store}!

All I need is an uninterrupted 1/2 hour. That might be the only thing to keep me from finishing this project.

Shaunna, at Perfectly Imperfect, shares this easy way to transform the ordinary into extraordinary!


Be sure to check out the entire process (along with oodles of gorgeous photographs) here!

Monday, March 15, 2010

Who Do You Think You Are? Week 2

To know who you are, you have to know where you have come from is the premise for NBC's weekly TV show, Who Do You Think You Are?

After the last snafu, I wasn't about to miss this week's episode. I made sure that the TIVO was properly set.

This week's segment featured football legend Emmitt Smith. Going into the show, he knew very little about his family's background. The journey not only uncovered his history but also his personal connection to the motherland Africa and the impact that it had on his life.

For me, finding records (like birth/marriage/death or census) of family members is a lot like opening a much anticipated gift, I was a little surprised to experience the same rush of emotions last week watching a complete stranger {Sarah Jessica Parker} discover her connections to the past. Guess what? It happened again! When Emmitt uncovered his family census and marriage records, it felt like it was Christmas morning. Kevin was watching the show with me. He felt the same exhilaration that I was feeling. I don't know if I'm grateful to know that I'm normal...or worried that we're both genealogy junkies!

Emmitt found what he was looking for. Towards the end of his journey, he said that he could hear his ancestors saying thanks for the closure that he was giving them... that all they wanted was to be remembered.

Me too, Emmitt. I've heard the voices too!

I loved Emmitt's final statement; History is not his story, it's MY story!

Sunday, March 14, 2010

More Letter Blocks Ideas


Just made a set of family letter blocks. My favorite part of it is seeing my kids turn it around to see all of the family faces.

We first did this project in the fall of 2009. We made sets that spelled the words: BOO, FUN, JOY, LOVE and FAMILY. Suni made an awesome family set, but I never quite got mine finished. I created a .pdf for anyone who wanted to use it for printing their own letters. Some people didn't like the fact that the letters were combined on the same sheet (if you wanted the word boo, you also got the letters for fun). I always meant to fix it, but lost the file when my hard drive crashed a few months back.

Since then, I've come up with a few other ideas for this project...

Mother's Day is a few short months away. I'm going to make a set spelling the word M-O-M featuring pictures of each of my children... equally nice will be a set for my MIL featuring her kids and grandkids.

I also just had a friend celebrate a son's marriage. We're waiting to get the photographs back to make a set using their wedding pictures and the date 2-0-1-0.

I'm putting these ideas out across the world wide web as a way to inspire you.... and to make sure that I get my projects done!

Here is the original Letter Blocks PDF (it spells the words BOO, FUN, JOY, LOVE, FAMILY --using all the letters over three different pages).

Here is the new Letter Blocks 2 PDF. This one offers three options: FAMILY, 2010, MOM. One word per page, but I'd still recommend printing it several times using different scrapbook paper (you can give the extra letters to a friend.) If the word didn't fill the page, I created a couple different font options of some of the letters. Also note that I used different fonts to spell the word FAMILY. If you want the same fonts as the one in the picture, you'll need to use the original Letter file.

You can easily make up your own words using letters large enough to fill the block. Our letters have been set up for blocks measuring 3.25".

For you to Gather:
3 - 6 blocks (depending on the word you're featuring).
Coordinating scrapbook papers to match theme (make sure you have extra squares to cover top and bottoms of blocks)
Decoupage Glue - We like ModPodge's Matte Glue
Printer -black ink works best for printing letters
Scissors
Foam Brush
Sandpaper
Sanding Block (Not really needed, but it goes a long way to saving your hands during the sanding process!)
Distress Ink or Chalk and Finishing Spray
9 - 18 pictures formatted to fit your blocks. The Photo Wizard will help you format your pictures to fit our blocks perfectly!

Step 1:
Determine the theme that you want to display.

Pick coordinating paper to match your word choice. 12x12 scrapbook paper works great. Just trim the paper to 8.5 x 11 before feeding it through your printer. Save any extra scraps for covering the top and bottom of the blocks. Print one of our letter block .pdfs, (see above) or your own letters on your selected papers. Cut out each square using the trim markings. (Trim depends on the block size that you're using. Project formatted to Stories by Me blocks.)

Step 2:
Prepare your pictures. You have two options here. Either print each picture to be at least as large as your blocks. Use the edge of the block to trace around each picture and cut away the excess. Or, you can use the Photo Wizard to get your picture to the exact size that is needed for this project. Need help using the Photo Wizard. See our demo. Still need help? We're only a mouse click away. Just email us at www.mythoughts@storiesbyme.com. Cut each picture to size.

Be sure to print your pictures using a LASER printer! Ink jet colors tend to smear when they get wet!!

Step 3: The cut ends of the wood absorb more glue than the grained ends. Before beginning this step, apply a thin layer of glue of glue to the ends with the rougher (cut) surfaces. Let glue dry.
Apply a thin layer of glue to the first side of one block. Place picture over glue and press in to place. Remove any air bubbles. While the glue is drying, repeat the process for other blocks. Check for overhanging paper edges. It is important to WAIT for the glue to dry before attempting to remove any excess paper. Add picture's 2 and 3 following same procedure. Once all of the picture are in place, add one letter square to each block. Complete this step by adding a decorative top and bottom paper square to each block. Don't worry about matching sides. A random look is great!

Step 4:
Once the glue is dry, carefully sand the edges of each block. Add a distress look by rubbing ink or chalk along the sides of each square to darken the exposed wood and remove any white paper edge.

Protect your project with several light coats of decoupage glue or matte Acrylic spray.

That's all that's to it! Remember, you CAN'T ruin this project. Fix any mistakes by simply sanding down the offending side and adding another layer.

Sit back, enjoy your handiwork and start telling the stories that accompany each picture!

Friday, March 12, 2010

More Ways to Feature Family Faces!

Oh my, I feel another family faces project coming on!

Brandy at Home Sweet Home recently shared a fabulous Photo Collage Clock tutorial. The clock is beautiful in and of itself. The fact that she pulled the project off with just a couple of dollars is unbelievable. I LOVE a BARGAIN... and a BARGAIN turned HEIRLOOM makes me feel almost giddy.

Brandy, you did good!


Steph also gets big kudos. She shared her Family Face Monogram at A Little Moore. I started a project similar to this one. I wasn't smart enough to do only a MONOGRAM. I envisioned spelling out our entire last name and got as far as the third letter. {My project ended up in the 'never to be finished, but can't bring myself to throw it out' pile} Adding the pictures to the side of the letter really adds to the finished piece, plus it lets you include several more faces.

Very clever Steph!

The Creative Homemaker has posted several ideas that have my wheels turning. I love the Block Game. We're talking super simple...and we ALL know that simple projects stand a chance of getting done. She took six blocks and added a family member's name to each side of the blocks. One side of each block also gets a heart -land at a heart, earn extra points. The players simply throw the dice, I mean blocks, and earn points based on how many times their name lands upright. {I personally would change the names to faces...but you know me, I add faces to EVERYTHING!}


Looking for a fun St. Patrick's Day decoration? The Creative Homemaker also shares a creative way for displaying pictures for the holiday.


This last idea offers a twist on the typical family tree. The end result is breathtaking. Brooke at Inchmark created the original pedigree as the family 2009 holiday card. She then offered an updated version to share some very special news. You've gotta check it out here!

Hopefully, that's enough ideas to get your creative juices flowing. We've been working on a new Family Chart of our own. Hope to share it soon!

Wednesday, March 10, 2010

Countdown to College

Where have the last 18 years gone? I am somewhat in shock as I watch my 18-year-old prepare for the next chapter in his life's story. Today was an orientation at one of the colleges that he is considering. He and I spent the day becoming familiar with the campus and freshman routine.

He focused his attention on the future...

...I couldn't help but look back.

I'll admit, there have been days that I felt like pushing him out of the proverbial nest. You know, those "don't let the door hit you on your way out" sort of moments. But today I watched MY BABY actually look like he belonged on that college campus. All I could think of was all the little moments that lead to this great big, GIANT moment. Moments in the car singing silly songs off-key (and at the top of our lungs). Spelling words frontwards, backwards and then in Spanish. Reading books so many times that we all had them memorized. Oh, and how could I forget T's talent of impressing our friends with his wide range of animal impersonations... Do you know what the llama says?

Yes, he's ready for the next chapter. I'm not ready to move forward. I'm going to curl up in my favorite chair and enjoy the story to date just a little longer.

Tuesday, March 9, 2010

Who Do You Think You Are? Week 1

Ugh, I missed it! I was so wrapped up in preparing for our Family History Fair, that I completely forgot to set the TIVO for Friday night's premier of Who Do You Think You Are?

Thank goodness
we live in the 21st century and I easily recovered with a simple visit to nbc.com website where they have posted the first week's episode featuring Sarah Jessica Parker.

My family will tell you that my happy place is anywhere that involves history. I'd choose a visit to our local Historical Society over Disneyland any day of the week and my top ten most favorite gifts include family pictures or family memories. I learned today that it doesn't have to be a personal family story to get my heart racing and stomach flip-flopping. I actually got goosebumps with Sarah Jessica Parker as she uncovered the stories of her gold-digging GGrandfather and bewitching GGrandmother.

Wanna know what would make the top of my MOST FAVORITE gift list? A solid month off from all of life's obligations, unlimited resources and access to the top genealogists in the world to help uncover my family stories! Ok, I know...not a realistic request...for me, or probably for anyone reading this blog. I have to be careful not to tell my hubby my wish; he always tries so darn hard to give me what I want.

It might take a lifetime to uncover all of my exciting family stories, but they are out there, and they are every bit as TV worthy as the stories that will be featured over the coming weeks on Who Do You Think You Are. BTW, the season pass is set on TIVO. I will NOT miss any more episodes!

Monday, March 8, 2010

Make a Family Face Button Box

Here's a fun project that we liked to call our Button Box. We use it for all of our extra face buttons for the Family Tree and Memory Calendar. You can use it as a catchall for any number of small items. It would also make a fabulous recipe box for all of your favorite family recipes. Mother's Day isn't that far off. If you get crackin now, you could get this done and make it a Mother's Day to remember!


Step 1: Gather Materials
you will need:
a wooden box,
Mod Podge glue,
foam brush,
damp cloth,
dry cloth,
variety of family pictures printed on a laser printer,
razor blade or exacto knife,
sandpaper,
Krylon Acrylic Matte Finish spray and distressing supplies, if desired.

Step 2:
Layout and Attach Pictures
Before you start gluing, it's a good idea to have all of your pictures trimmed. Get an idea of where to place each picture by laying them in position on the box. Once you have a plan, use the foam brush and apply a thin layer of glue on the wood box. Apply just enough glue to cover the space where the first picture will go. Use the dry cloth to rub the picture flat, making sure there aren't any air bubbles. For the next picture, again apply a thin layer of glue where that picture will be placed. Be sure to place glue over the first picture where the second one overlaps. Place the second picture and LIGHTLY wipe around it using your damp cloth to remove any excess glue. Then use the dry cloth to smooth the picture and remove any air bubbles. Rub gently. If you rub too hard you will rub the ink off the picture. Continue for all sides of the box until the box is covered with your pictures. It's a good idea to have a variety of picture sizes available to fill in spaces as you work through the project. We also like to print our pictures in a combination of black/white (gray scale) and sepia for visual interest.

Step 3: Trim Edges
Trim any overhanging paper edges using your razor blade or exacto knife. (Make sure that the glue has dried before you trim! Otherwise you will just tear the pictures.) If you have glued a picture that covers both the lid and the box, take your razor blade and cut along the seam to separate the picture.


Step 4: Sand and Distress
After all of your pictures are glued, trimmed and dry, sand the edges of your box using the piece of sandpaper. We like to soften the corners to help 'age' the box. Rubbing distress ink or chalk on the edges will also give the project an authentic 'old' look. Let the ink dry before giving it 2 or 3 coats of the Matte Finish Spray. This seals your project and protects the pictures.

Thursday, March 4, 2010

Who Do You Think You Are?

I cannot wait for Friday. I LOVE Fridays in general, but tomorrow is extra special as it is the premiere of the series


They had me at the name.

The description to the show starts something like this; "There's no such thing as an ordinary family. Each one has its own story." I already know that. I'm hoping that the show will offer new sleuthing techniques. If nothing else, listening to stories of self-discovery are always interesting. I might seem the ordinary wife/mother/daughter... but peel away the layers of my heritage and who knows what you might find; heiress/adventurer/criminal.

I thought that the exclusives/family facts section of the website was pretty cool. You can type in your surname and learn all sorts of interesting facts about your last name.

The only problem with tomorrow's show is the fact that I have no time to watch it. We will be at the South Davis Family History Fair on Saturday and tomorrow is the set up. Then there's the carpools, kids play and friends wedding all standing between me and my hour of T.V. time.

Thank goodness for TIVO!

Tuesday, March 2, 2010

Is your handwriting worth preserving?

This isn't a rhetorical question. Yes or No... is your handwriting worth preserving? Years and years before I knew how much I loved preserving family stories, I sat at the feet of my grandfather mesmerized at the stories of his childhood. Even at the age of 14, I knew that my 93 year-old grandfather couldn't live forever and I wanted my future kids to know him like I knew him through his amazing stories. I asked that he write down one or two stories. He wrote me a book. Even as a self-absorbed teen, I understood the sacrifice Pops had made. His formal education ended in the sixth grade, the English language had never been easy for him to learn, and he was now completely blind in one eye. This book is one of my most prized possessions!

Seeing the words on the pages all these years later still conjures all sorts of memories. I can smell Pops cheap aftershave; mixed with the sweat of the day's physical labors. I feel his chin whiskers scratch against my cheek as I swoop in for a goodnight kiss. The jagged letters that form each word remind me of the crooked, bony elbow that he awkwardly carries at the side of his slight frame; the result of a youthful wrestling injury. The broken sentences on the page match the years of halting English.

More than three decades have gone by, but Pops is still here, right next to me. He lives through the precious gift that he left me.

So again, I ask the question. Is your handwriting worth preserving?

I came across the most unique concept today. Imagine Forever will take your handwriting... or your kids handwriting... or a parents... and turn it into a digital font that you can use over and over and over again. Having embraced the digital world years ago, I see real merit in the concept and wanted to share the link for anyone looking for a gift for that person who has everything. Really, there are ALL sorts of applications, from thank you notes in your own handwriting (without having to HAND WRITE a single word!), to preserving a child's precious first letters, or journal entries that look and feel like they were laboriously penned.

Whether or not you decide to digitize your handwriting, family members will cherish your memory through the written word...especially if it was written by YOU!
Thanks for the memories Pops! I love you. See another brief tribute to Pops here.

Monday, March 1, 2010

Personalized Food Plates

Kalleen's done it again, I've loved following her blog At Second Street. She's just posted an idea for making your own food faces. Seems like it's the perfect way to invite family members to the table AND encourage picky eaters to EAT! Check out her instructions for a complete rundown of the project, but here's the reader's digest version...

1. First you get a picture. Make it large enough to fit the plate.

2. Next you'll turn the picture into a line drawing that can be transferred to the plate.

3. A few bold lines, a couple of colored fill-in's and you're done! It's THAT simple! I do have a couple suggestions that I'd like to add to the process to simplify it EVEN more...

Check out Dumpr.net. I like their Photo Pencil Sketch option for turning photographs into coloring pages. You can also use Photoshop, if you have it, but I've found this option is SO easy to use, it's a NO brainer!

I now have a picture of my mother that I can transfer to the plate.

The other thing that is mulling around in my brain is to find a way to use this idea at a family gathering or reunion. Imagine planning a meal around a featured ancestor. Serve all of her favorite foods...maybe feature one of her secret recipes and then bring it to the table on plates FEATURING HER! I wonder how well the picture would hold up if we used paper plates?
Thinking out loud here!