"I found a way to combine two photos on one puzzle side. You have probably been there and done that, but just in case you have anyone who needs help with that random problem, I figured a way out that has worked for me!"We are always 'PhotoShopping' someone in (0r out) of one of our projects. Of course, we were curious to learn a different technique.
Well, Emily taught us a fabulous new trick! [This works best using pictures with similiar backgrounds. These beautiful pictures are my husband's grandparents.]
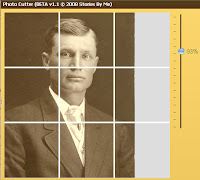
 Hopefully, you've already digitized your pictures. Load them into the Photo Wizard. Select the puzzle project and pick the picture that will serve as the background. I didn't want to lose any detail of Grandma Hyer's beautiful dress, so she'll be placed in front of Grandpa. Try to position the background picture so that it fills two of the three rows. This can be a bit tricky, but I kept adjusting the picture size and location until it was just right. I scaled Grandma's picture to match Grandpa and then place her over the third row.
 Save the pictures and add their files to the print list. Press the Print button located on the Wizard page and print the .PDF file that is sent to you.
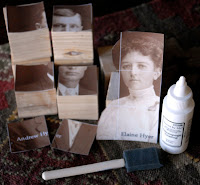
 Since we are using Grandpa's picture as the background, I cut his squares out first. I ignored the row on the far right since Grandma's picture will go there.
 Follow the kit instructions for gluing the picture squares to each block.
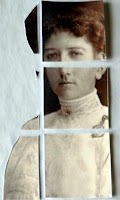
 Next, I cut out the section that featured Grandma. Be sure to include the parts that will 'overlay' on the middle row of blocks. It was easy to follow the cream outline of the dress, but Grandma's dark hair blended into the background color and I had to 'guess' on her hair style.
 All that's left is to glue these pieces to the blocks. Once you add pictures to the other sides of the puzzle, you can sand, distress and protect the project with a coat of acrylic spray.
What a ingenius way to add faces. Thanks for sharing, Emily!


1 comment:
google 3589
google 3590
google 3591
google 3592
google 3593
google 3594
Post a Comment