HOME     PROJECTS     STORIES     PHOTO WIZARD     ABOUT     WEBSITE
Showing posts with label memory puzzle. Show all posts

Tuesday, October 18, 2011

Yahoo! Memory Puzzle Kits are Back!


We are now ready for Christmas! We only say that because our puzzle kit order arrived and we can now help you get your gifts ready for the holidays!

You didn't think we meant that WE were READY FOR THE HOLIDAYS? Oh yeah, we can't even find 15 minutes to blog about our lives right now. (One of us...only trying to save face here by not mentioning names, actually mailed last year's holiday cards in April.) OK, I can't drag Suni down into my world. She is MUCH more on the ball than I am. Knowing her, she's already scheduled a photographer for this year's family picture. I think we'll just be using last year's picture again!

Life might be out of control, but I do have some fabulous memories that will be enjoyed for years and years! Here are some of the puzzles that I've made over the years. I wish that we had kept count of all the puzzles that we've made or helped to make. It is easily in the thousands by now.

As you can see, every one is a masterpiece!


Friday, November 12, 2010

Why Does it Do That?

If you have tried to format your pictures using our Photo Wizard, you might have noticed a slight variation between what you see on your screen and the final print that our Photo Wizard sends you.
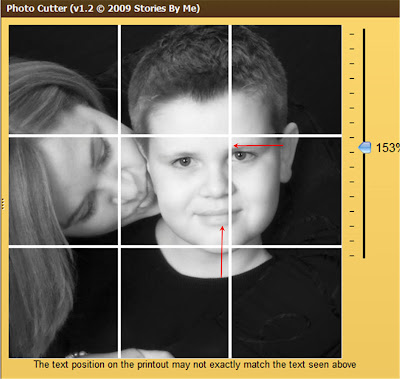
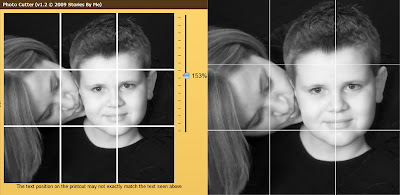
Here's the screen version. Formatting pictures for the puzzle can be tricky because you are trying to keep the 4 lines (nine sections) from dissecting important parts of the picture. I scaled the picture to 153% to fill the frame to my liking. The position of the faces look OK too. Notice how the right line falls to the left of the boy's eye and near the bottom of his chin?
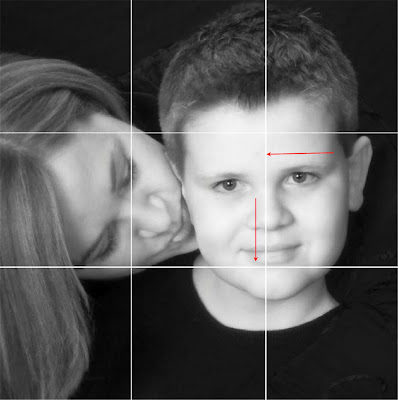
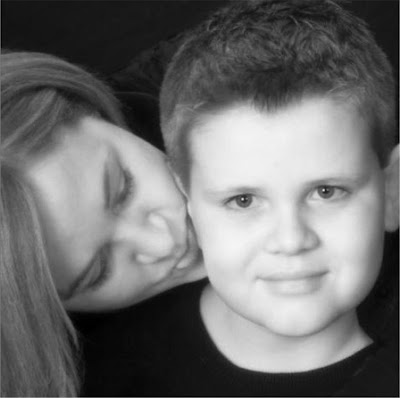
The above image shows the picture as it comes back from the Photo Wizard. WHAT? The line now runs down the center of the boy's nose and near the bottom of his lip. That's no big deal, but one of the other lines (the line that you CUT!) now runs through the mom's eye. That is a much bigger deal (partially because it's MY EYE!) Seriously, we've helped more than a thousand of you create these works of art. It's no big deal to cut through an ear, forehead or cheek, but cutting through someone's eye is somewhat disturbing as it distorts the entire face.
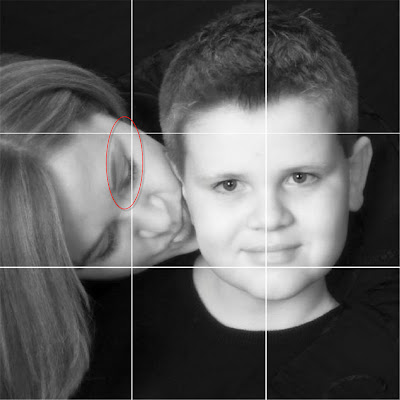
Our programmer tells us that this is due to the fact that we are viewing the image on our screen, but the software formatting the picture actually resides on a server several states away. Because of the myriad of computer monitors, not to mention all the varieties of possible settings, our software has to make some assumptions as to what you are seeing.
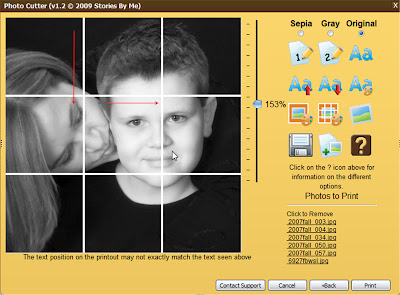
Knowing that the Photo Wizard sees things slightly to the left and down from what I'm seeing, I simple pushed the picture up a little and to the right of where I wanted the final line to reside.
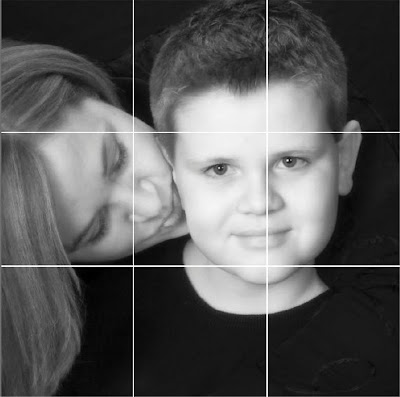
I now have the perfect layout for the puzzle project. This cute picture was from a family photo shoot a couple of years ago. I'm actually whispering into the ear of my son during the session, telling him to knock off whatever shenanigan he was up to. The photographer captured the moment and it's ONE of my favorite pictures!

Other projects are much easier to layout. Here's the ornament project...
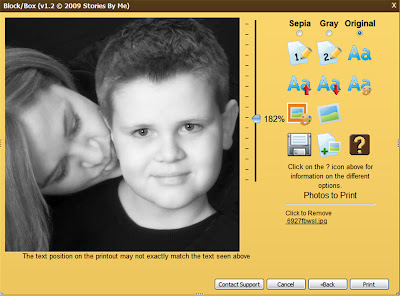
Notice that a smidgen of the ear is missing. Not a big deal as I know that I'll be sanding that edge and distressing it with ink as I finish the ornament. If I wanted to, I could apply the same process of pushing the picture slightly to the right to get the entire ear in the window.
Keep in mind that you can only have ONE active print job in your account at a time. If you decide to reformat your pictures and repress the Print button, you'll get the following message:
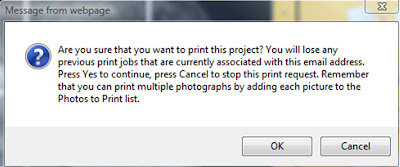
If you think you MIGHT want to use that previous layout, save a copy of the file to YOUR COMPUTER. (Saving a copy of the email doesn't help, it only provides the link to your file!)

Now you know!

Thursday, November 11, 2010

It's Begining to Look a Lot Like Chrstimas!

Christmas gift #1 is finished, wrapped and delivered! That's a big deal for this small team of hopeless dreamers. (We have some BIG plans around here...just never enough time to pull it all together!)

At one of our recent classes we met a darling attendee that just went wild over the different projects. She had seen some of our kits in the local stores, but didn't understand their full potential until we displayed our finished pieces at the class. She went crazy and bought items for ALL of her family, not to mention several work friends. She happens to work for a pretty important government official in our state and together, we decided to present him with a memory of Utah's history.


Check it it... it's completely done and ready for Christmas (AND it's still early November!!) Now if I could only get my act together on the rest of my holiday plans...

Tuesday, October 26, 2010

Memory Puzzles Back in Stock!

Our memory puzzle kits have been a hot little item and recently, we have found ourselves scraping the bottom of the barrel. We are happy to say that we have received an order of metal trays and we are back in business!

Of course, that's not what this post is really about.

Our passion is for telling a story. Our newest order of puzzle trays have quite the story, and that's BEFORE they had a chance to get into your hands for the story telling!

I received an apology from our metal company with the shipment of the new trays. One of the trays came with a series of numbers written on the back of it, identifying a potential getaway car in a robbery. We learned that the company noticed a robbery going on across the street while they were processing our order. The worker couldn't find a piece of paper, so he grabbed the first thing he could find to write on; one of our puzzle trays.


We thought it quite the story! {Don't worry, it's not going into our inventory. We're hanging on to this tray!}

Monday, November 30, 2009

Help us meet Martha!


We need your help! Michaels is having a handmade holiday contest. Of course, we think that our products make the perfect holiday gift so we quickly entered our Memory Puzzle Blocks. The grand prize winner receives TWO tickets to NYC to see the Martha Stewart Show. Oh how Suni and I would LOVE a free trip to the Big Apple. Even better, we'd LOVE, LOVE, LOVE a chance to swap ideas with the queen of crafts, Martha! Help us make this dream a reality!

Go here to vote for us. Click on the snowmen on the bottom of the page...the more you like the project, the more snowmen you click!

Looking for your own kit? They are in now available in all Roberts Craft and Deserert Book stores.

Wednesday, November 11, 2009

New Puzzle Kits

Our puzzle kits now come with a new and improved metal tray. We selected metal that, over time, will develop a darker, vintage-looking patina. Because we feel that looking like 'you've been around the block once or twice' adds character to a finished project, we came up with a few ways to speed along the process.

The metal is shipped with a protective coating to keep it from aging prematurely. You'll want to remove it for these processes to work best. We sprayed our tray with a common household cleaner (something that will cut grease), rinsed and dried it.

Bleach Bath: In the example on the left, we submerged the tray for about an hour in a bucket of regular household bleach. Make sure that you use common sense when working with bleach; wear old clothes, rubber gloves and protective eye wear! Once we removed the tray from the bleach, we carefully rinsed it under water. The resulting piece was a little too rusty for our liking, so we did a quick once-over scrub with our handy Bar Keepers Friend (a BEST friend in my kitchen!) and fell in love with the end result!

Coke Bath: This easy process simply requires a bucket of coca-cola. You'll want to use soda that is fully carbonated. Soak the tray over night for best results. Don't try to drink any soda that is used in this process. (I offer this piece of advice because I had a teenage son seriously dumb enough to consider swiping a swig.) Once the tray has soaked sufficiently, rinse it in water and thoroughly dry it. The tray on the right features the end result. It offers a more subtle distressed look then the bleach process and was voted most popular by all of our friends that were polled.

These versatile trays can also be painted (use a paint made for metal) or decorate the outer edge with stickers or decals. Protect your furniture by placing felt or rubber bumpers on the bottom corners of the tray. A six-inch square of fabric in the bottom of the tray will provide a nice cushion for your blocks. The inside of the tray is also a perfect spot for storing extra copies of the puzzle pictures.

Keep in mind that the major emphasis in this project is the six pictures contained on the nine blocks. The tray is just a handy way to display and store the puzzle.

Saturday, February 28, 2009

Think of the Possibilities!

Had a fun class at the Ft. Union Deseret Book store today. It's always nice to get together with people who understand our passion (or is it obsession?) and validate the long hours and sleepless nights of trying to get our ideas into project form. The best part of classes is seeing the pictures that participants determine need preserving and hearing the stories that make these pictures so meaningful.

Today, Sharon made a memory puzzle using pictures of past trips to the Oregon coastline. The puzzle was beautiful, in part, because of the fabulous pictures that Sharon had taken, but the real beauty was hearing Sharon's stories of past visits to these picturesque lighthouses and the memories that had been preserved in her mind.

Lori is a talented crafter who put the pedal to the metal and cranked out TWO puzzles in the time most of us can barely get through one. She recently became the proud keeper of an entire box of family photos and she made a wonderful keepsake of her grandparents legacy. She also bears the distinction of being a descendant of a local town's namesake. She beautifully preserved pictures of many of the town's early buildings and will give this puzzle to the current mayor, who just happens to be another relative.

As we visited, we discussed the countless options our blocks kits provide for preserving memories. I've personally given puzzles for wedding gifts, baby gifts, birthday gifts and Christmas gifts. Obviously, I think our Memory blocks make a great gift! We've seen puzzles made of summer vacations, family pets and historical events. The ladies at the class suggested that I throw the question out there to our world-wide audience... what life events do you consider important enough to preserve for future generations?

Sunday, February 22, 2009

We've been busy!


We couldn't wait to show you what's been keeping us so quiet on the blog front... and housework front and time with friends front...

Some of the products are new and improved, some are brand-spanking new; all will be available on our website and/or Etsy store.

Let us introduce you:
Memory Puzzle Blocks - These are what got us started. And what a great start!! We'll be eternally grateful to My Mind's Eye for giving us a hand-up and helping us bring in our first boatload of puzzle kits. We've now sold more than 10k of these wonderful little kits that preserve memories in the uniquest of ways. This year we hope to introduce a Stories by Me kit version. We think you'll like (scratch that...LOVE) our new and improved Memory Puzzle Block kit!

Memory Trees - These big guys were unveiled last summer and much to our delight were an instant hit! We're thrilled that you have embraced them and made them such a popular gift item. Yes, we know that the hard part is finding pictures of all the loved ones that need to be featured in your family tree. But it is SO worth the effort! Remember that while our tree's were made to display 3 or 4 generations, you can keep making face buttons and add them to your family button box. That way no one gets left off of the family tree!

Our designer, Carol, has done us proud!! We are drueling over our new Antique Floral design and the Cream Leaf pattern goes with EVERYTHING!

Vintage Tins - These beauties were created in conjunction with our Memory Trees. We had all these fabulous vintage photographs that were begging for a more prominent spot than what the archives could offer. They have been a huge hits at our shows and our collection keeps growing, thanks to your many suggestions. Only problem is that we haven't figured out how to make them available on our website since the collection is constantly changing. We're working on adding a core collection to the website and will put other pieces on Etsy, as time allows.

Memory Calendars - We are so excited about our new Memory Calendars. We've been kickin' around the idea for nearly a year and then BAM! it just all came together beautifully. The calendar will be sold in kit form (like the Memory Trees) and offer just what you need to make your own memorable calendar. What makes these so cool is that you'll be able to customize your calendar by featuring family faces on special dates. We know... we just had to include family pictures in the project! Yeah, the picture is so tiny, it doesn't do justice to the finished project, but more pictures are coming. And, Suni is working to get this into our Etsy store.

Wednesday, January 14, 2009

Happy Thoughts

We are bustin' our seams with pride over the kind comments received in recent weeks...
I just wanted to let you know how much I have enjoyed making these photo blocks. Your photo wizard was wonderful and the projects turned out great. I think both my mom and my mother-in-law will enjoy this new way to look at family photos. Also, I appreciated the quick response I received earlier when I thought I had a problem receiving my project. Nice to know there is support behind a website. Have a very Merry Christmas.
Angela L
Vancouver, WA

I just wanted you to know that our class went very well. My pictures were a perfect size and lined up perfectly with very little sanding. I hope the next ones I do turn out as well. I appreciate all your help. I will call upon you if I need assistance. These are great Christmas gifts!

Bonnie
Midwest

THANK YOU THANK YOU THANK YOU THANK YOU THANK YOU!!!!!
Have a GREAT day!
Thanks again. You've helped a ton!
-Dari

Just wanted to write and tell you how much I love my puzzle blocks. A friend of mine gave me one for Christmas last year, and it is making the perfect gift to all my family this year. The kits are AWESOME and make it so simple....thanks for a great website and a great photo wizard. I will be telling all of my friends about your site and can't wait to give the puzzles to my family members-- I know they will love them as much as I do!
~Judi P
Utah

And just today, someone shared pictures of a favorite Christmas gift at Nannygoat. We love your puzzle Kathryn!

Thanks for sharing, everyone!

Thursday, December 11, 2008

The Greatest Gifts

A wise man once said:
"We all enjoy giving and receiving presents. But there is a difference between presents and gifts. The true gifts may be part of ourselves--giving of the riches of the heart and mind--and therefore more enduring and of far greater worth than presents bought at the store."

Create a tradition that will keep giving all year long. Decorate a wooden block to look like a gift. Perform secret acts of service for family members and leave the small gift at the scene.

A two-inch wooden block might be remembered as the greatest gift you received this year!


Here's how to make your own special memories:

~Materials Needed~
2 inch wooden block
(can be a different size, but we just happened to have 2" blocks available!)
Red or Green Craft Paint
Foam Brush
Sandpaper
2x8 inch section of Christmas giftwrap paper (optional)
Mod Podge Glue (for paper version)
Distress Ink (See Distress It for our favorite colors)
Scissors
Ribbon / Tag


1. Paint block. If you are making the wrapping paper version, you only need to paint the top and bottom of the block.

2. For the gift-wrapped version, cut a strip of paper that is slightly larger than 2x8 inches. Apply to block section by section using Mod Podge glue and brush. Be sure to remove any air bubbles. Let the glue dry before cutting away any excess paper.


3. Sand corners and edges of block. If desired, distress exposed wood to give the gift a time-worn look.


4. All that's left is to add a ribbon and tag. Our tag says:
"An act of service you can give
to family members where you live.
Leave this present, then depart,
the truest gifts come from the heart."


Friday, November 14, 2008

Preserve Your Puzzle Story

Here's a great idea that came from one of our class participants. She wanted to preserve the stories that accompanied the photos of her memory puzzle blocks. She printed a duplicate set of pictures for the project. She added a paragraph or two about who was in the picture, when and where the picture was taken and why this photo was important to her. She then slipped the pages into sheet protectors and a three-ring binder. Instant book! Kids (big and little) now have an easy way to know which pictures to search for.

Thursday, November 6, 2008

Why didn't we think of that?

We recently received an email from a customer who said:

"I found a way to combine two photos on one puzzle side. You have probably been there and done that, but just in case you have anyone who needs help with that random problem, I figured a way out that has worked for me!"
We are always 'PhotoShopping' someone in (0r out) of one of our projects. Of course, we were curious to learn a different technique.

Well, Emily taught us a fabulous new trick! [This works best using pictures with similiar backgrounds. These beautiful pictures are my husband's grandparents.]

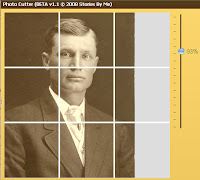
Hopefully, you've already digitized your pictures. Load them into the Photo Wizard. Select the puzzle project and pick the picture that will serve as the background. I didn't want to lose any detail of Grandma Hyer's beautiful dress, so she'll be placed in front of Grandpa. Try to position the background picture so that it fills two of the three rows. This can be a bit tricky, but I kept adjusting the picture size and location until it was just right. I scaled Grandma's picture to match Grandpa and then place her over the third row.


Save the pictures and add their files to the print list. Press the Print button located on the Wizard page and print the .PDF file that is sent to you.


Since we are using Grandpa's picture as the background, I cut his squares out first. I ignored the row on the far right since Grandma's picture will go there.


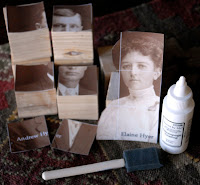
Follow the kit instructions for gluing the picture squares to each block.


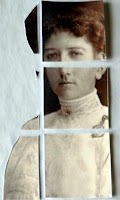
Next, I cut out the section that featured Grandma. Be sure to include the parts that will 'overlay' on the middle row of blocks. It was easy to follow the cream outline of the dress, but Grandma's dark hair blended into the background color and I had to 'guess' on her hair style.

All that's left is to glue these pieces to the blocks. Once you add pictures to the other sides of the puzzle, you can sand, distress and protect the project with a coat of acrylic spray.

What a ingenius way to add faces. Thanks for sharing, Emily!